
Grand Prix vs Early e6+d5 Plan: A Complete Breakdown for White
As promised, I'll be dedicating a post solely to counteracting Black's early e6+d5 setup in the Grand Prix attack of the Sicilian
In the previous blog, we explored the Grand Prix Attack in its most popular form: when Black fianchettos the kingside bishop and castles short. That setup is by far the one you’ll face most often in practical play (especially in blitz) because it’s simple, logical, and almost premove-able: Nc6, d6, g6, Bg7, Nf6, O-O. Players normally know those moves and don’t have to think too far ahead.
But there is another important setup you need to know about: the ...e6 + ...d5 system. Now, this may not be as fun as those full-throttle kingside attacks against the fianchetto, but I promise there’s still both bite and comfort here. Even if the games don’t end with a queen sacrifice on h7, you’ll often find yourself with a pleasant structure, some pressure, and certainly plenty of opportunities to outplay your opponent.
Why I Recommend Switching Gears After 2...e6
Let’s start with this: after 1.e4 c5 2.Nc3 e6, I actually don’t recommend sticking with a Grand Prix structure. Why?
Because after 3.f4 d5, Black immediately challenges the centre. If they manage to trade off on e4, suddenly the pawn on f4 feels oddly placed: it no longer supports a center, and it actually blocks the bishop on c1 from developing naturally. In other words, the whole point of the Grand Prix gets diluted.
Yes, you can definitely still try it, and there are playable lines like:
3.f4 d5 4.Bb5+ Bd7 5.Bxd7+ Qxd7 6.d3
Here White keeps a centre, and if Black captures on e4, we recapture with the pawn, not the knight (as that would destroy our powerful centre with pawns on e4 and f4: something which is a key feature of a Grand Prix Attack). That leaves us with a healthy structure and even a slightly more pleasant endgame after queens get traded, as in that case, after taking on d1 with a knight, we'll be able to follow up with natural moves like c3, Be3, Nf3, Nf2 (protecting e4) and even Ke2 (as castling is not needed in endgames). And if Black doesn’t capture on e4, we can just castle, play Qe1–Qg3/Qh4, and launch a kingside push anyway.
So the Grand Prix certainly isn’t dead here, but to me it still feels like not something I would wanna go for, especially with a light-squared bishop exchange. Personally, I think this is the moment to switch gears and play 3.Nf3 followed by d4, transitioning into the Open Sicilian. Why? Because the Open Sicilian after 2...e6 is a lot less dangerous than after 2...d6 (Najdorf) or 2...Nc6 (Sveshnikov). In fact, this move order cleverly sidesteps Black’s sharpest weapons while still giving us good chances for kingside play later.
So the bottom line:
- Against 2...d6 or 2...Nc6: Stick with the Grand Prix setup (3.f4).
- Against 2...e6: Strongly consider 3.Nf3 and heading into the Open Sicilian.
That’s already a huge win for us: with 2.Nc3, we’ve successfully avoided the Najdorf and Sveshnikov without giving Black anything truly dangerous in return.
When Black Tries ...Nc6 First and Then ...e6
Of course, one might note that Black can be sneaky. They might play 1.e4 c5 2.Nc3 Nc6 3.f4 e6, and suddenly you no longer have the option to go into the Open Sicilian — you’ve already committed with f4. So what happens then?
Actually, I don’t mind this move order at all. Why? Because now Black has already committed to Nc6, which gives us an extra hook to work with. Let’s see why.
The Key Line: Bb5 Against ...d5
The main line goes:
- e4 c5
- Nc3 Nc6
- f4 e6
- Nf3 d5
- Bb5!
This move is critical. It prevents Black from easily breaking down the centre with dxe4. If Black does capture, we can ruin their structure with Bxc6, leaving them saddled with weak doubled c-pawns. That’s the key difference compared to the 2...e6 move order, where Black could meet Bb5 with ...Bd7, forcing a bishop exchange on favorable terms.
Black’s Main Tries
- 5...Ne7
This is the most common. Black avoids the awkward Nf6 (which runs into e5) and tries to complete development quietly. - 5...Nf6 6.e5 Nd7 7.Bxc6 bxc6 8.d3
Here we aim for queenside pressure: b3, Na4, c4, sometimes Ba3. Black’s pawn structure is already weakened. - 5...dxe4 6.Ne5 Bd7 7.Bxc6 bxc6 8.Nxe4
Again, Black’s structure is ugly. White has plenty of play against the c-pawns. - 5...d4 6.Ne2
This 5...d4 actually really helps us: the centre is frozen, and we can castle, play Qe1–g3, and aim at the kingside in a normal fashion. Also, we don't mind if Black goes for Bd7+a6 to chase down our light-squared bishop, we can always give it away for that knight here and follow up with d3, it's no big deal.
A Model Plan
Let’s go a bit deeper into one of the main lines:
5...Ne7
6. exd5 exd5 (we'll look at Nxd5 move a bit later)
7. Qe2!
This is a very important move to remember. It pins the awkward knight on e7 and threatens to damage Black’s structure with Bxc6.
After something like:
7...Qd6 (preventing queenside pawn damage by protecting the c6-knight, as in case of some other move like 7...Bg4 we would happily trade on c6 to leave Black with doubled pawns and then follow up with b3+Ba3, and also it's worth noting that 7...Bd7 simply blunders a pawn: we can utilize the pin and play 8.Nxd5)
8. d4!
White strikes in the centre. Black will most likely have to trade with ...cxd4, but then after Nxd4, White is better developed and has a freer game.
If Black develops carelessly, say with 9...Bd7, disasters can happen fast. Here’s a game between two 2200+ players that shows the kinds of dangers that await Black if they aren't careful enough:
9...Bd7 10. Be3 O-O-O 11. O-O-O Kb8 12. Nb3 Be6 13. Bxc6 Nxc6 14. Qf2 g6?? 15. f5!
And suddenly White crashes through on f-file and the dark squares. A textbook example of how dangerous it can be for Black if they misplace just one piece.
In normal play, though, after Black tries to go for kingside castling with 9...g6, the position often settles into something like:
10. Be3 Bg7
11. O-O-O O-O
12. Qf2 Be6 (if Bg4 then simply Rd2)
13. Rhe1
Here White is beautifully centralized, Black’s isolated d-pawn is under fire, and exchanges will generally favor us. It may not look as flashy as sacrificing on h7, but it’s the kind of position where White can keep pushing comfortably for a long time.
What If Black Takes with the Knight: 6...Nxd5!?
Up to now we’ve mostly looked at 6...exd5, the more natural recapture. But engines nowadays tend to prefer 6...Nxd5, keeping the pawn structure healthier and avoiding the immediate Bb5-c6 damage.
The position might continue:
6...Nxd5
7. O-O (simple development is best)
-
7. Ne5 Bd7 8.Bxc6 Bxc6 9.Nxc6 bxc6 10.Qf3 is also playable, but allows Black to untangle more easily.
7...Be7
8. Ne5 Bd7
9. Qg4 Nxe5
10. fxe5 Bxb5
- If 10...O-O instead of 10...Bxb5, 11. Nxd5 is very good for White.
After:
11. Nxb5 O-O
12. d3 Kh8 (to prevent Bh6)
13. Rf3 f5!
Black almost always has to break open the kingside sooner or later, as otherwise White’s pressure just keeps building up the pressure.
Here White can continue:
14. exf6 Bxf6
15. c3 a6
16. Na3 b5
17. Nc2 Qe7
18. Bd2
And while the engine might call this equal (with counterplay from ...b4), I’d take White every time in blitz. The play is simple and pleasant: bring a rook to e1, lean on the weak e6-pawn, and keep an eye on Black’s somewhat drafty king.
Also it's worth noting that if Black tries a slower move like 13...a6 instead of ...f5, White can even ignore the hanging knight and ramp things up with:
14. Rh3! axb5 15. Qh5 — and suddenly the attack becomes deadly.
So even though objectively Black holds, practically this is a position where White’s plans are much easier to find. And at the end of the day, that’s the real value of the Grand Prix: positions that play themselves while your opponent has to walk a tightrope.
Conclusion
So here’s the takeaway:
- Against 2...e6 straight away, I recommend switching to the Open Sicilian with 3.Nf3. Why water down the Grand Prix’s essence when you can get a healthier centre and still keep kingside play later?
- Against 2...Nc6 3.f4 e6, stick to the Grand Prix. The inclusion of Nc6 actually gives you an edge, because the Bb5 pin and structural ideas work in your favor.
- Don’t despair if Black goes for the early ...e6+d5. While it’s less wild than the fianchetto setups, it often leads to very comfortable positions, with targets on d5 and c5 that you can pile up on. And comfort is not to be underestimated — especially in blitz, where “easy-to-play” often beats “objectively critical.”
You may also like
 doughnut42
Why It Is So Easy to Mess Up a Winning Position
If you keep messing up in winning positions, you're not alone, and in this blog I'll try to talk abo… FM MattyDPerrine
Why Masters Crush Lower-Rated Players (and You Struggle)
Hint: The secret isn’t a high ceiling TotalNoob69
Destroy the Caro Kann with style
... a beautiful line with a lot of lessons to impart doughnut42
How to Know When to Pause and Think in Blitz
If you struggle do understand when to trust your instincts and play fast in blitz, and when to take … CM HGabor
How titled players lie to you
This post is a word of warning for the average club player. As the chess world is becoming increasin…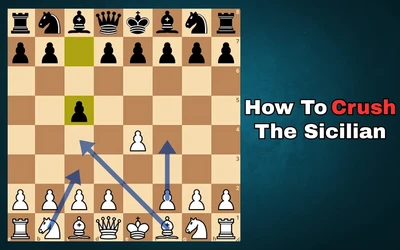 doughnut42